微信小程序3级联动选择器的使用办法
[摘要]这篇文章主要为大家详细介绍了微信小程序三级联动选择器使用方法,具有一定的参考价值,感兴趣的小伙伴们可以参考一下本文实例为大家分享了微信小程序三级联动选择器的具体代码,供大家参考,具体内容如下效果图实...
这篇文章主要为大家详细介绍了微信小程序三级联动选择器使用方法,具有一定的参考价值,感兴趣的小伙伴们可以参考一下本文实例为大家分享了微信小程序三级联动选择器的具体代码,供大家参考,具体内容如下
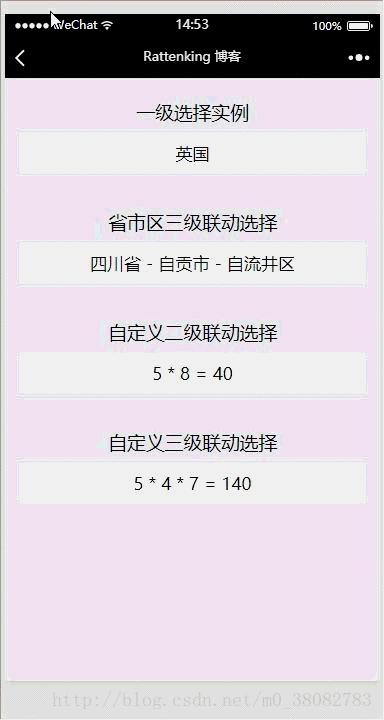
效果图

实现原理
利用微信小程序的picker组件,其中:
1,普通选择器:mode = selector实现一级选择实例;
2,省市区选择器:mode = region实现省市区三级联动;
3, 多列选择器:mode = multiSelector实现二级和三级联动的10以内数字的乘法。
WXML
<view class="tui-picker-content">
 <view class="tui-picker-name">一级选择实例</view>
 <picker bindchange="changeCountry" value="{{countryIndex}}" range="{{countryList}}">
 <view class="tui-picker-detail">{{countryList[countryIndex]}}</view>
 </picker>
</view>

<view class="tui-picker-content">
 <view class="tui-picker-name">省市区三级联动选择</view>
 <picker bindchange="changeRegin" mode = "region" value="{{region}}">
 <view class="tui-picker-detail">{{region[0]}} - {{region[1]}} - {{region[2]}}</view>
 </picker>
</view>

<view class="tui-picker-content">
 <view class="tui-picker-name">自定义二级联动选择</view>
 <picker bindchange="changeMultiPicker" mode = "multiSelector" value="{{multiIndex}}" range="{{multiArray}}">
 <view class="tui-picker-detail">
 {{multiArray[0][multiIndex[0]]}} * {{multiArray[1][multiIndex[1]]}} = {{multiArray[0][multiIndex[0]] * multiArray[1][multiIndex[1]]}}
 </view>
 </picker>
</view>

<view class="tui-picker-content">
 <view class="tui-picker-name">自定义三级联动选择</view>
 <picker bindchange="changeMultiPicker3" mode = "multiSelector" value="{{multiIndex3}}" range="{{multiArray3}}">
 <view class="tui-picker-detail">
 {{multiArray3[0][multiIndex3[0]]}} * {{multiArray3[1][multiIndex3[1]]}} * {{multiArray3[2][multiIndex3[2]]}} = {{multiArray3[0][multiIndex3[0]] * multiArray3[1][multiIndex3[1]] * multiArray3[2][multiIndex3[2]]}}
 </view>
 </picker>
</view>
WXSS
page{background-color: #efeff4;}
.tui-picker-content{
 padding: 30rpx;
 text-align: center;
}
.tui-picker-name{
 height: 80rpx;
 line-height: 80rpx;
}
.tui-picker-detail{
 height: 80rpx;
 line-height: 80rpx;
 background-color: #fff;
 font-size: 35rpx;
 padding: 0 10px;
 overflow: hidden;
}